I really like the updates that FOREVER made when they introduced FOREVER 3.0 last fall. The Filters especially make it so much easier to find what you’re looking for.
But there’s one issue that has come up for a few of us, even more than once, since the upgrade: edits that won’t save.
What can you do when you make an edit, like trying to change the date for a photo, and the change won’t save?
There may not be only one solution, but here’s one that has worked several times. I contacted FOREVER Support last fall when one of my clients had this problem. As I was waiting for a response, I ended up with the same issue, so I got to test it first hand.
Support asked me to try clearing my cache. When I did that, suddenly the changes/edits would save.
I asked my client to do the same, and it worked for her, too.
how to clear your cache
When you visit a website, your browser is set to save some data, like web pages and images, so that it can retrieve that information sooner and load the website faster the next time you visit.
When you visit FOREVER.com on your computer to work with your stored photos, you use a browser to do it and that browser will cache some of what you’re working with. Depending on how many photos you are working through, that can be a lot!
So if you run into problems saving changes you make, my first recommendation would be to clear your cache.
Google Chrome
In your Chrome browser, go to the ellipsis in the top right corner and click on Delete browsing data.
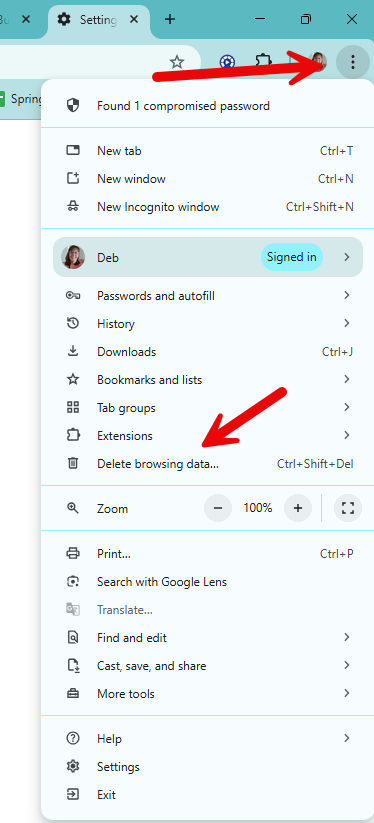
In the dialog box that opens, you have several options for what you can clear.

Personally, I rarely check the top box that says Browsing History. This is an option that you definitely want to use if you are giving your computer to someone else because it will erase all of your browsing data. But if you plan to keep using your computer, it’s easier to keep that box unchecked. But the choice is always yours.
For our purposes, I would just leave the bottom 2 boxes checked. Then click on Delete data.
Once you’ve cleared the cache, try making one of the edits again. If it still doesn’t work, reboot your computer so that your computer’s virtual memory is also cleared. Then try again.
Firefox
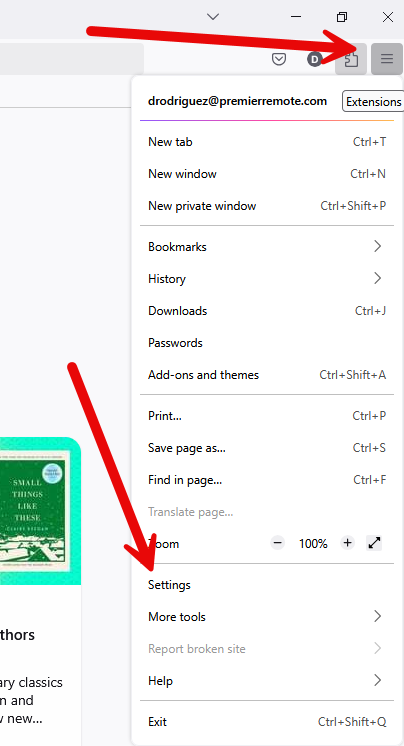
To clear the cache in Firefox, you need to first click on the hamburger menu on the top right in the browser window and select Settings.
In Settings, click on Privacy & Security in the lefthand menu, then scroll to Website Privacy Preferences. Then click on Clear Data.
(You can choose to go to Manage Data instead and try clearing only the Forever site data, but you never know if some of the other data might be holding up the changes as well. I just find it easier to Clear Data.)
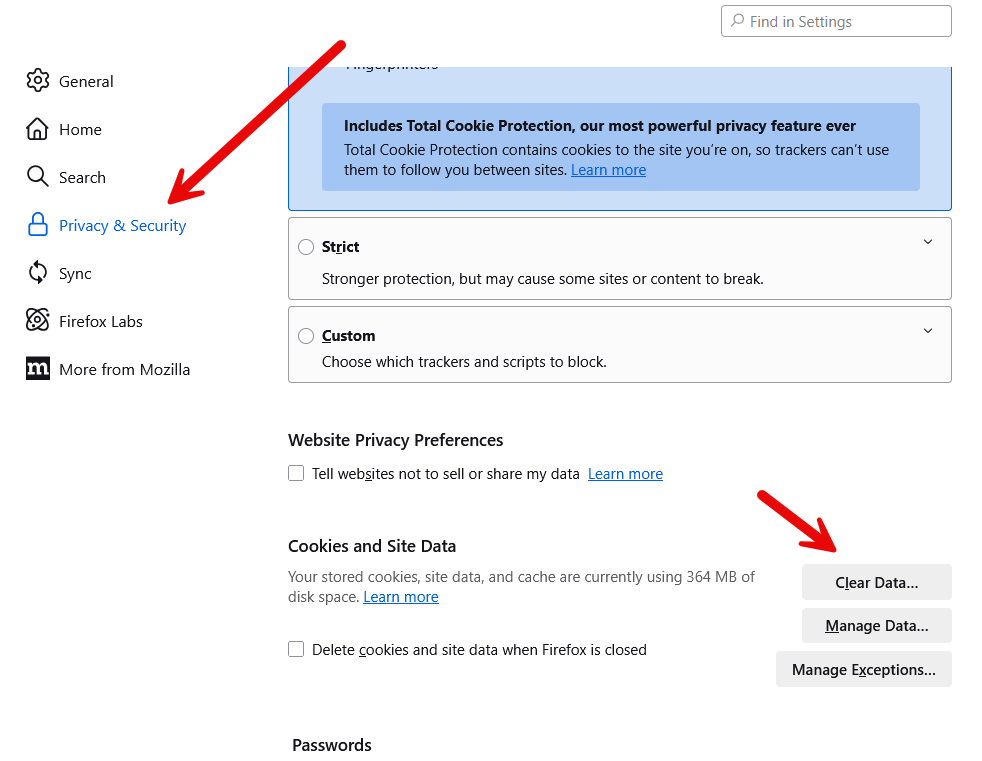
Like I mentioned above, if the Clear Data doesn’t immediately fix the problem, reboot your computer and then try again.
Microsoft Edge
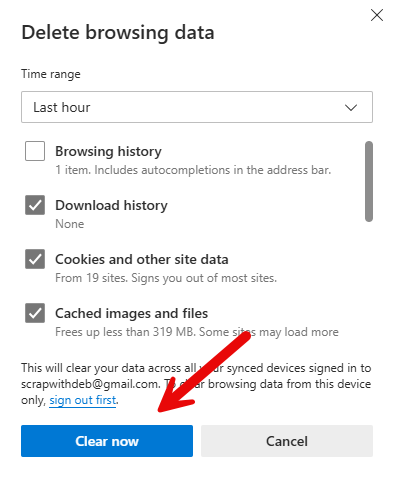
To clear the cache in Microsoft Edge, click on the ellipsis in the top right corner and click on Delete browsing data.
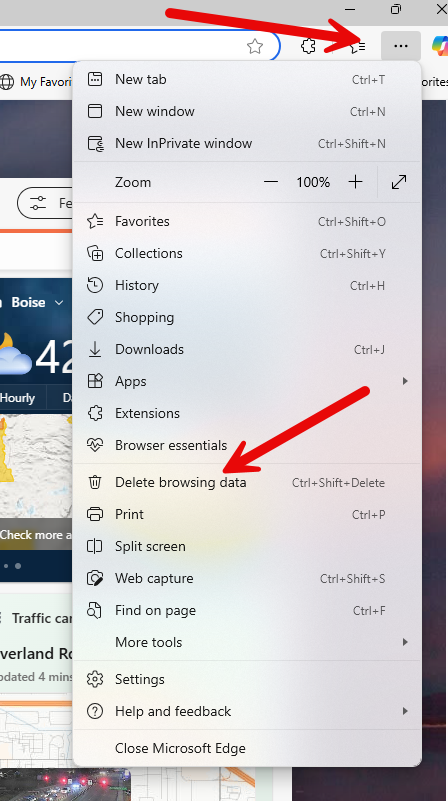
In the dialog box that opens, check the boxes for the data you want to delete and click on Clear now.
As I mentioned for Chrome above, I personally don’t usually check Browsing history because I don’t want to have to re-login to everything. But there’s nothing wrong with keeping that box checked. It’s totally up to you.
Those are the instructions for clearing the cache for the 3 main browsers. If you use another one, look for the browser settings and you should be able to find some way to clear the cache. I wish I had a Mac so I could grab those screenshots for Safari, but I don’t (at the moment).
Hope this helps if you ever need it. More than that, I hope you don’t need it!
Let me know if there’s a question I can answer.