
Artisan has an amazing calendar tool that has been part of the software almost since the beginning. But I’ve found that it’s a little known tool. Today I’m hoping to help with that. Hold on, this is going to be a long post.
how to find calendar templates
You can create a calendar from scratch in any Artisan project. I’ll show you that in a minute. But before we get to that, I want to share the easiest calendar making tool – free templates available to get the process started. Each year Forever offers a free calendar template download that is a great place to start. To find it, first open Artisan and click on Manage Content in the top left. In the screen that opens up, click on Get Free Art Kits which will open a new browser window.

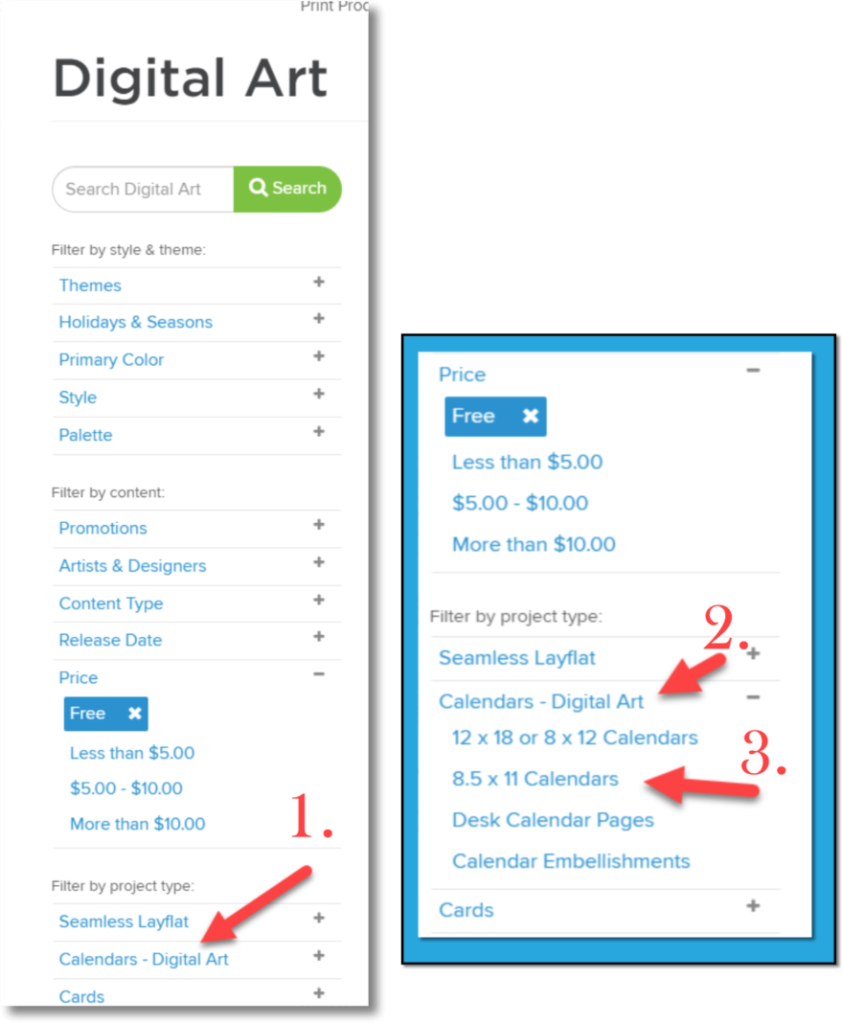
In the new browser window you’ll see all of the free art kits currently available. You can certainly look around, but don’t get distracted here. Our goal is free calendar templates. So to further filter the options, on the left hand menu, click on Calendars – Digital Art under Filter by Project Type. (Keep Free selected.)
Then it’s easy to just choose the blank calendar template for the year you want and get started.
Now, if the calendar you want isn’t there, that’s when you want to learn to use the Calendar tool in Artisan. Let’s talk about this next.
using the calendar tool
This is one of the coolest things about Artisan and it’s been in the software the whole time! This tool will allow you to add a calendar block anywhere in any project and dial up the exact style of calendar you want.
You’ll find the Calendar tool at the right side of the Insert ribbon in Artisan.
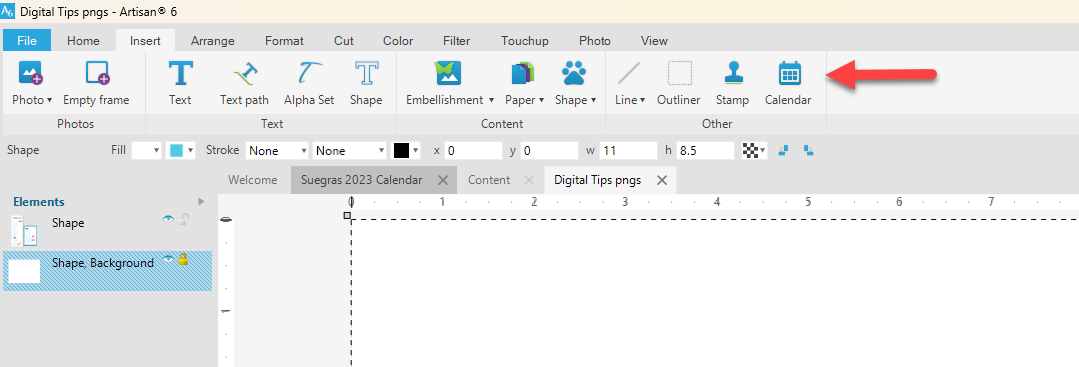
Click on the calendar icon and it will immediately add a calendar page to your project. You can resize it to whatever size you wish. However, that is not all!
When you place the calendar in your project, there are many editing options that open in the panel on the right side of the page. These tools allow you to change everything from the calendar style, to all fonts used and their sizes and colors for each and every section of the calendar.
By default, the top section is open when you place or format the calendar. This section allows you to easily change the month and year of the calendar block (1.), and also allows you to change the style of the calendar (2.).
- Changing the month and year is helpful in two main ways. First, if you are creating a calendar block in a project that isn’t using a calendar template, this allows you to be precise with the month and dates you want to use.
- Or, and you’ll find this to be the case as you make calendars year after year, you’ll open a calendar template you want to use and find that it was made for a different year than the one you want, so the dates won’t land on the right days of the week. In this case, what you’ll want to do is right click anywhere in the calendar block and select Calendar > Format.
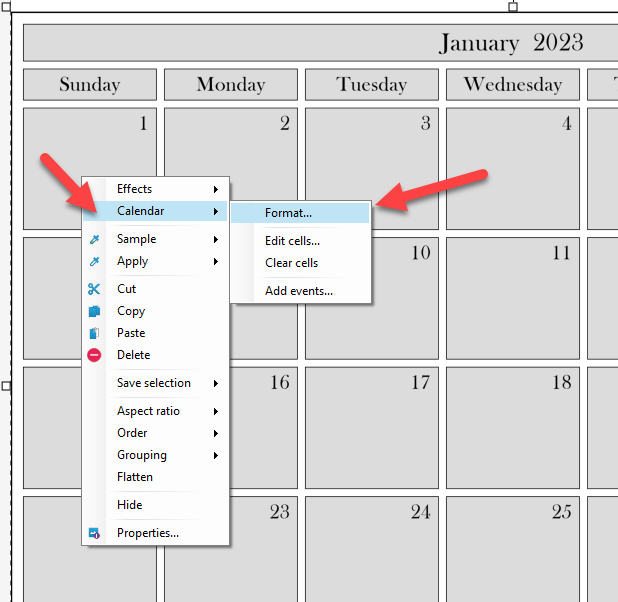
This will open up the Calendar editing option in the right hand panel.
editing calendar blocks
Here’s the beautiful part. First of all when you click on Select a different calendar style …

A pop out box will appear that offers 6 different calendar style options.
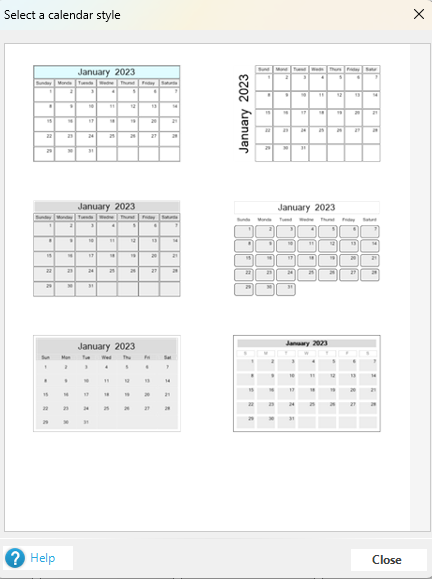
Choose one that’s close to the style you want. Don’t worry if it’s not perfect. Now comes the fun part.
Now that you have the “style” you want, you can revise the fonts, font sizes, positions and more for each part of your calendar block.
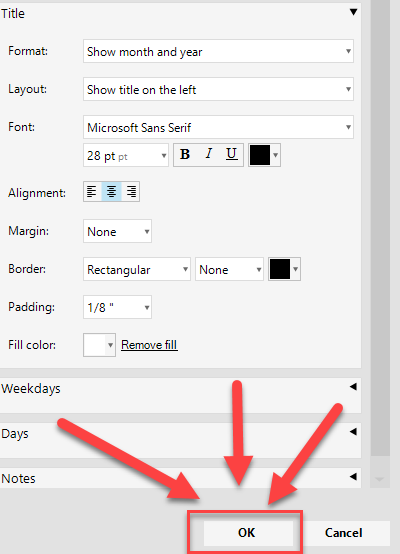
Click on the carat/triangle next to Title and it will open the Title options for the calendar block.

Then under Format, you can use the dropdown to have it show the Month and Year for the title (default), or just the Month, or nothing at all.
Below that under Layout, use the dropdown to change where the title is displayed – on the left, on the top, on the bottom or on the right.
And then, of course, you can change the font, the font size, the color and the alignment, etc. beneath that.
Similar options are available under Weekdays, Days and Notes. You can customize all these options in the calendar block from the Format options.
Before you click away, make sure to Click OK at the bottom of the options panel on the right! If you click away before selecting OK, you will lose everything you just did and you’ll have to start over. So be sure to click OK!
apply calendar style to other months in the calendar
Now you should have a beautifully customized calendar block for one month. But what about the other 12?
Again, this is a super cool option in Artisan, too. (There are so many great features in this software. I’m sorry, but I have to say it.)
With your new calendar block selected, go to the Format ribbon at the top and click on the Sample icon on the right side of the ribbon. In the dropdown, click Calendar style. This will do just what it says – it will sample the entire style you just applied to this calendar block.
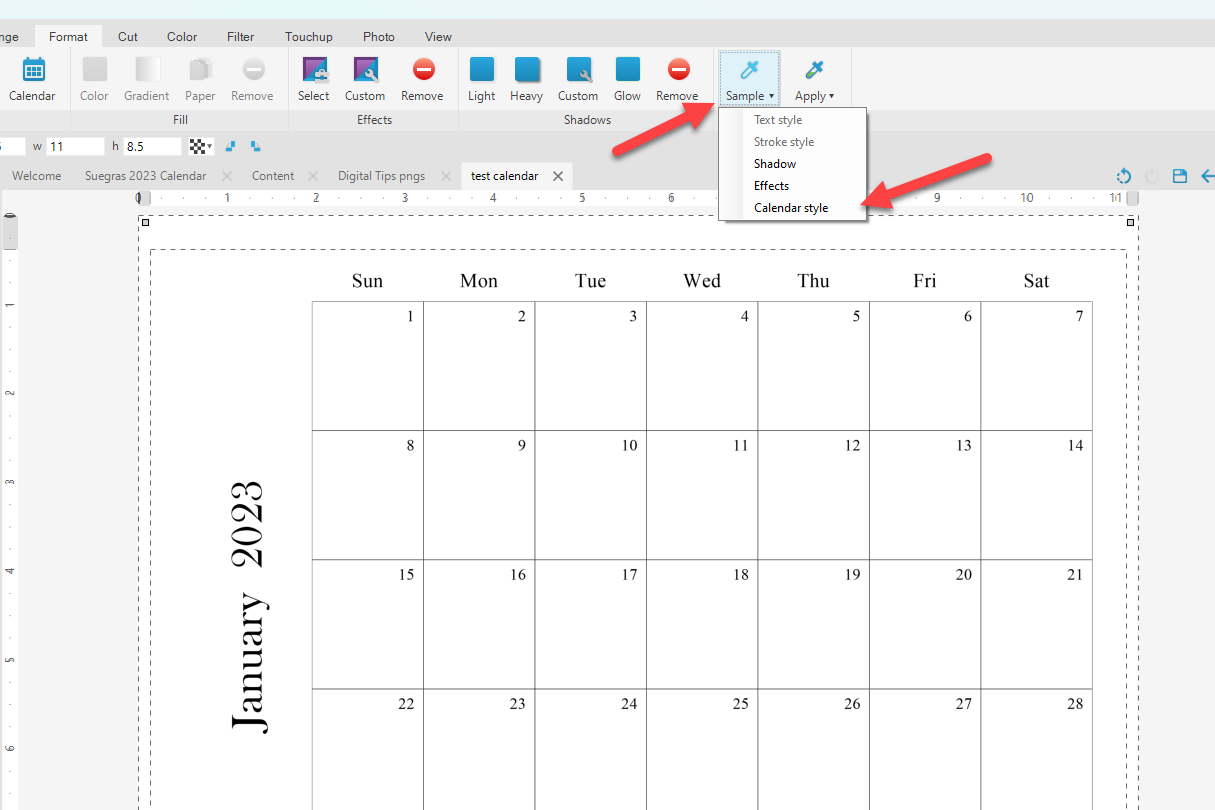
Now, select the next calendar page that you want to apply the same style to. You may have to click once on the calendar block to select it. Then, in the Format ribbon at the top, click on Apply and select Calendar Style from the dropdown.

And that’s all there is to it! Your calendar style will update to the same settings. Just make sure to click Save. It’s simple to go to each calendar page and apply the same style to each.
There is still more to share, but I don’t want to delay your use of these tips, so I’ll add more soon.
In the meantime, please enjoy using this fabulous calendar tool and let me know if you have questions!
