
Today, I did something I haven’t done in two years.
I shot a YouTube video for you. Woohoo!
It’s all about how to import/use Creative Memories’ digital content (or digital content from any site other than Forever) into Artisan 5 for use in your photo projects. You can view the video below, or scroll down to read about it.
I had a similar video to this one that I recorded almost three years ago in one of my DebsDigitalTips YouTube channels, but I wanted to update that. Plus, I made the mistake a couple of years ago of forgetting how to login to my YouTube account and I actually have two of them now. They are both me, but I had to make a decision about which one I would move forward with.
Step 1 – Download and extract your content.
Creative Memories puts out some great digital content, and I realized this past weekend at my retreat that quite a few folks don’t know how to take advantage of that. It’s not that complicated, and something that can be utilized with different digital content creators, so it’s a helpful tip to learn.
You’ll want to start out with the .zip file that you download from Creative Memories. They provide a nice page in your account called My Downloadable Products where you can access all of the digital content purchases you have made (with this current CM company. This will not give you access to downloads from the former Creative Memories that went out of business in 2013.)
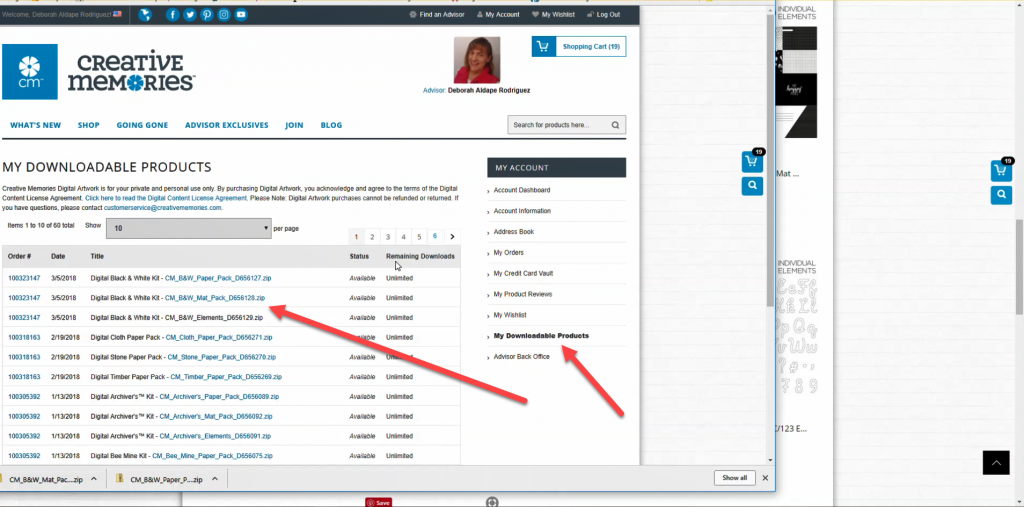
Once you download the .zip files, you need to Extract them from the compressed file before you can use them. To do this, find the downloaded .zip folder, select it, and then click on the Extract option in the top menu ribbon.
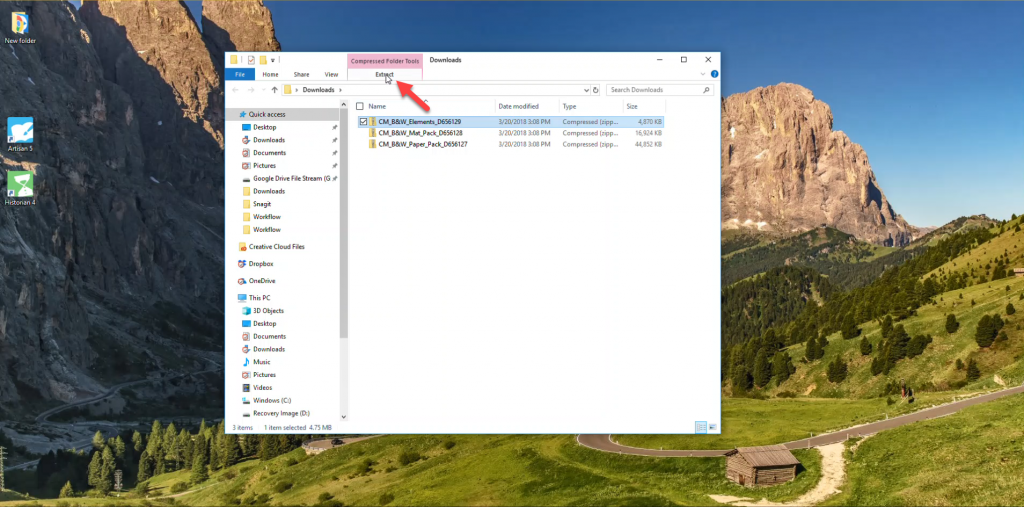
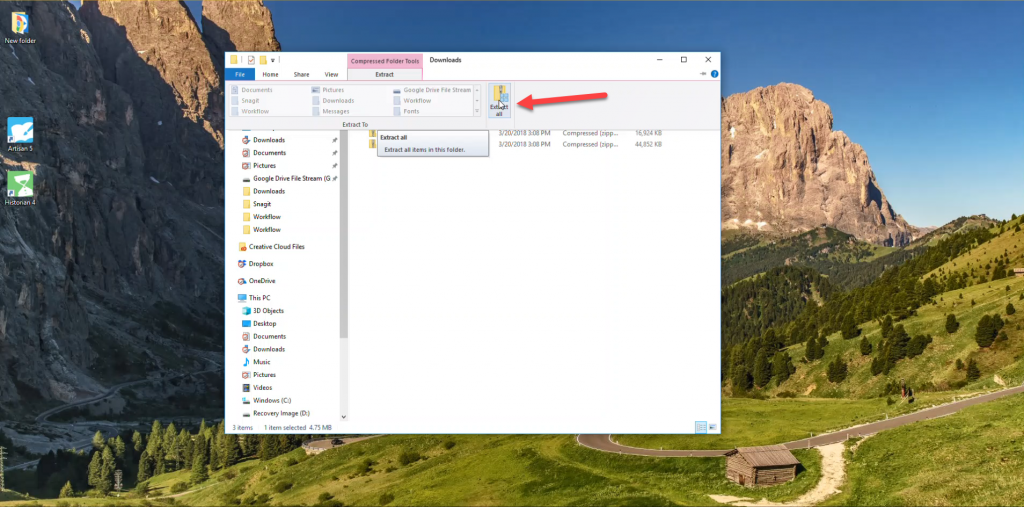
Once you do that, the Extract All button will appear in the menu ribbon. Click on that and it will extract all of the files from the compressed folder.
Once the files are done extracting, you may have a new window pop up with your extracted files. (Whether this happens depends on your computer’s settings.) In my opinion, this extra open folder window is just unnecessary, and I close it. That newly extracted file will be sitting pretty right there in the original folder you were just extracting from, no worries.
The .zip folder that was just extracted is no longer really necessary, so I delete it. Otherwise, it’s like having double the content on your computer and you can run out of space quickly. There’s no real purpose to that .zip file once it’s extracted, so it’s safe to delete it.
Step 2 – Create a new art kit in the Artisan Content Manager
There’s one thing to remember about getting non-Forever content into Artisan’s content manager: DO NOT use the Import content button. That will not work for non-Forever content because it’s packaged differently. (And that’s why we have this tutorial. ;0)
Instead of clicking on Import Content, click on Manage Content to open up the Content Manager screen.

Once you have the Content Manager open, you want to click on Create art kit.
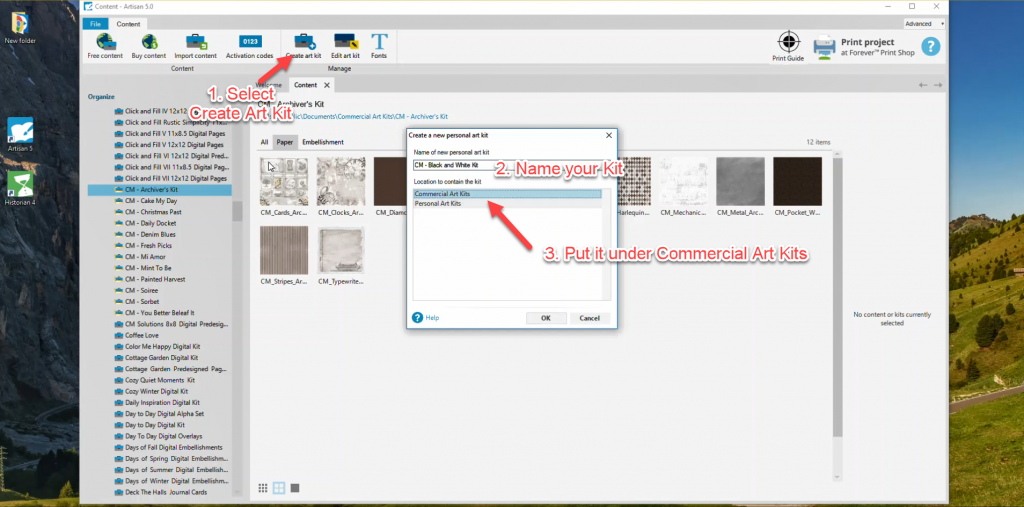
This will open a box that allows you to name your new art kit and designate where it will reside in your content library. I recommend naming the kit in a way that will let you know who the content was purchased from. For example, I have named all of my Creative Memories kits starting with “CM – nameofkit” so that they are all grouped together and I can easily find them. And I recommend designating any commercially purchased artwork, whether it’s from CM or another vendor, under the Commercial Art Kits section. These are still rightfully commercial kits, and it will be a lot easier to remember that you have them. If you put them in the Personal Art Kits section, you may not see them and therefore use them as often.
Step 3 – Add the content to your new Art Kit
We’re in the home stretch now. Once you’ve created that art kit, you will be presented with the blank screen waiting for your new content to be added.
Here’s how easy it is to do that.
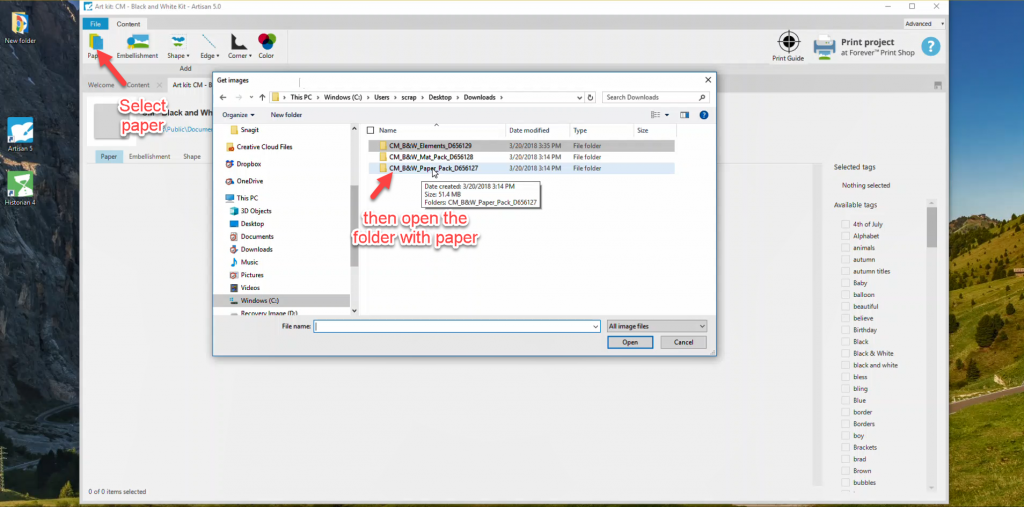
Start by clicking on the Paper icon on the top left side of the menu at the top. A window will open allowing you to browse to those newly unzipped file folders that hold your content. Since we picked Paper to start with, make sure that the folder you select is the one that contains only the digital papers. It’s important to keep the type of elements separated so that you get the right type of element to show when you need to use it in your project.
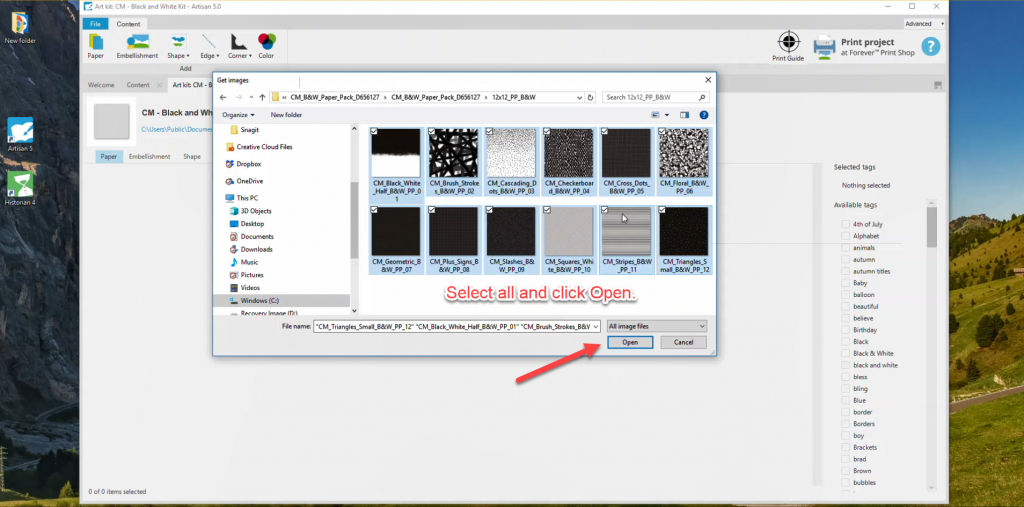
It’s a lot quicker to select all of the paper elements at once before clicking Open. That way it will bring in all of the paper elements in one pass and you won’t have to keep going back to add more. You can select all of them by clicking on the first one, holding down the Shift key and then selecting the last element. OR, you can select the first element, then hold down the Ctrl key and click A. Then click the Open button and all of those items will start appearing under the Paper tab in your content screen.
Wait! You’re not done yet! Now you have to do the same thing, but with the Embellishments.
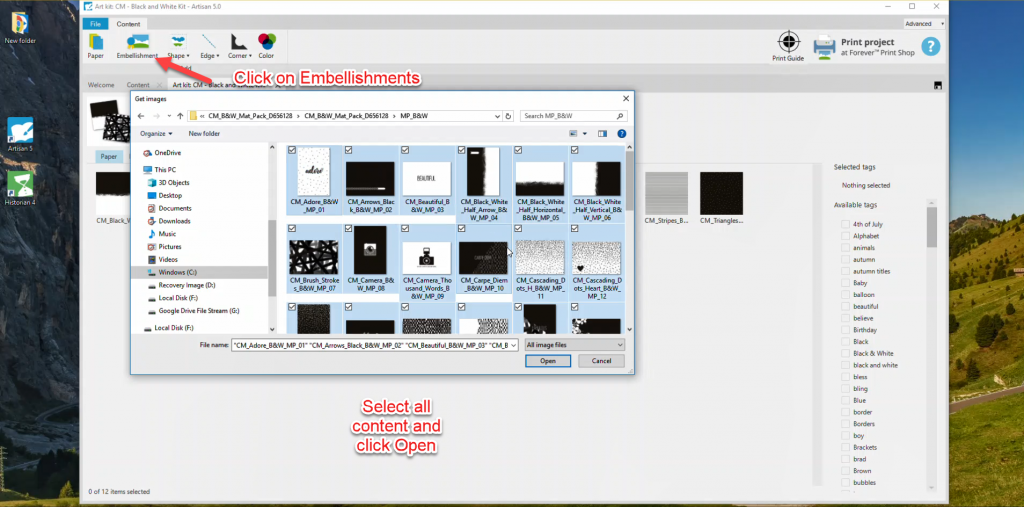
Click on the Embellishment icon in the menu ribbon and repeat the same process you did for the papers. Again, just make sure you import embellishments on this step (things like mat packs, alphabets and “stickers”).
Step 4 – Tag it!
This is a totally optional step, but the final thing I like to do once I bring all of my content in is to quickly tag the elements while I still have the content window open for that kit. This is something you can go back and do later, but why not just get it done?
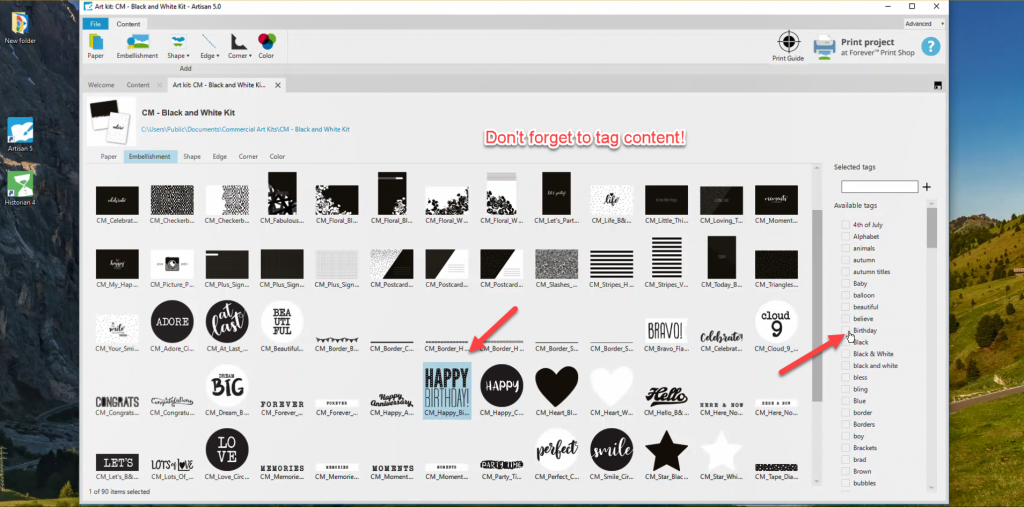
You can select just one element or multiples and click on the checkboxes next to the appropriate tags on the right side. You can also type in your commonly used tags in the box at the top and the + sign to add. I tend to just click the checkboxes, but it works the same for both. Then you can use the Tags feature to quickly drill down to the kind of content you want to use when working in your projects.
That’s really all there is to it! Happy creating!

Hi Deb,
I am trying to import at PDF to my Artisan project (Artisan 5). How do I do that?
Hi, Jane.
In order to use your PDF in an Artisan project, you will need to convert it to a JPG or another graphic file. Artisan can’t utilize it in PDF form. If you Google “convert PDF to JPG”, you can find several online conversion options that won’t cost anything. Just make sure you don’t click on anything spammy.
Deb
How would you organize the CM Kits using an external hard drive? I have to keep all my content on the EHD due to hard drive space. I can set Artisan to find the CM folder I set up in the hard drive but want to know if there is way to organize Like the artisan kit. I have about 85 CM. kits to add to Artisan
Cheryl,
So, is it only the CM content that you are keeping on the external drive? Or is Artisan already set up to find all of your Artisan content on the external? If Artisan already finds all of the content on the Artisan content on the external, then setting up your CM content by creating each as a personal art kit will keep it on the external as well. Artisan really only wants to “look” in one location to find all of the content.
Let me know if you are still having this issue, and if the Artisan content is on the external as well, and we can go from there. I want to make sure I understand the question.
Deb
Is there any way to get digital kits from the old Creative Memories (that I used with Storybook Creator) into Artisan, or into Photoshop Elements? I’d really like to be able to use all those kits!
Thank you!
Kara,
You should be able to use your Creative Memories kits in Artisan. It’s really just an upgraded version of the same program, and they should activate with the same code. Just use the Import Content option to load them.
As far as using them in Photoshop Elements, I don’t think that will work. I’ve used it some, but I don’t think there’s a way to use the old CM kits that way. The new Creative Memories content is universal and can be used in Photoshop Elements.
Deb