If you haven't yet upgraded to Storybook Creator Plus 3.0, now's the time to do it! The cost to upgrade doubles at the end of the month. And I'm going to show you something that makes the upgrade worth it all by itself. (I may have said that before, mainly because there are PLENTY of reasons to acquire this upgrade. It's FABULOUS! as my friend Candy would say.)
In case you haven't seen it yet, here's what the new Content Manager looks like:
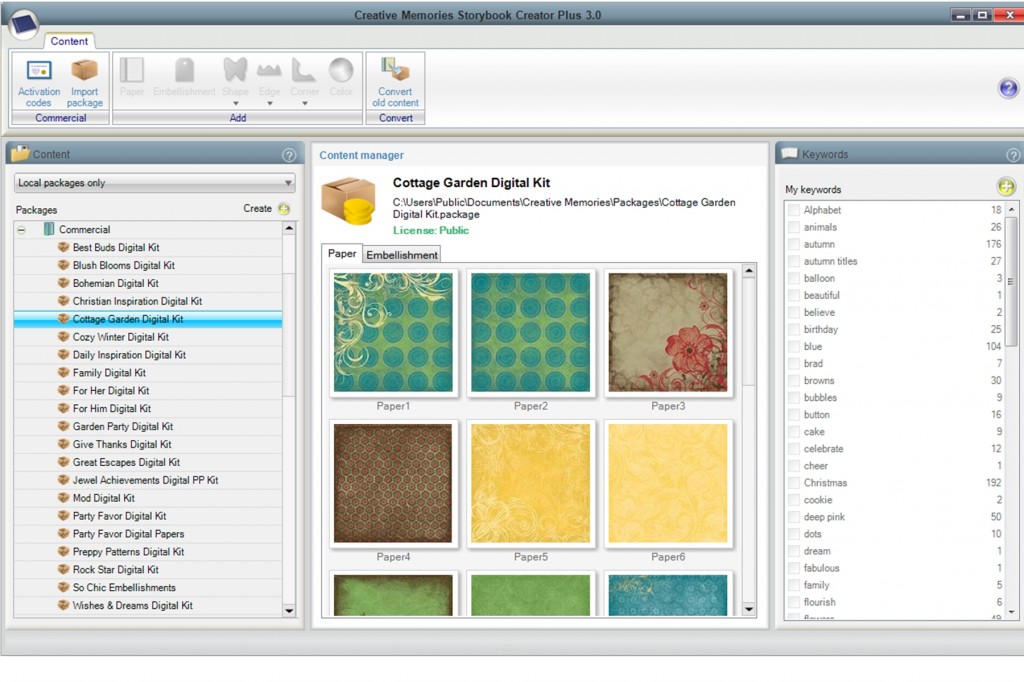
There are several WONDERFUL features to this new content manager. First of all, you get this great, clear look at your packages and predesigned pages. If you need a closer look, just double click on the paper or embellishment.
On the left hand side of the screen, you'll notice all of your packages listed in a folder called Commercial. When you first import any CM content package, that's where it'll go. But you can click the plus sign icon above that column and add your own folders to organize your content.
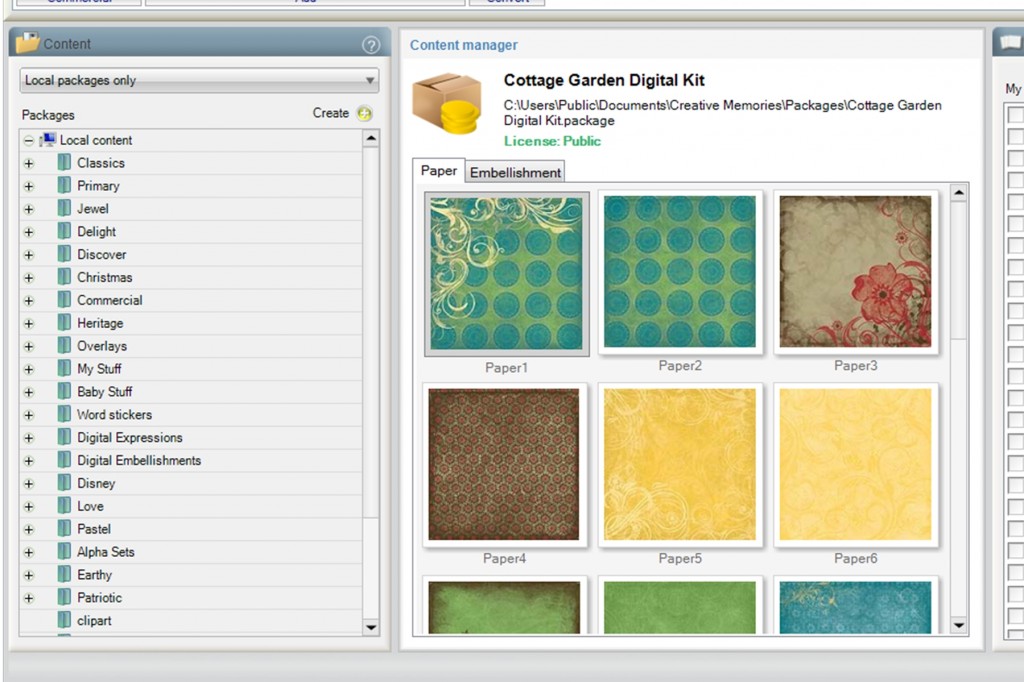
For someone like me who has a LONG list of content, this can shorten the amount of scrolling you have to do to find a particular package if you're looking for a paper or embellishment to add. I have my packages arranged by Palette or special category, but I've heard others who arrange by season or theme. You need to choose what works for you and the way you make pages. Here's a look at my folders:
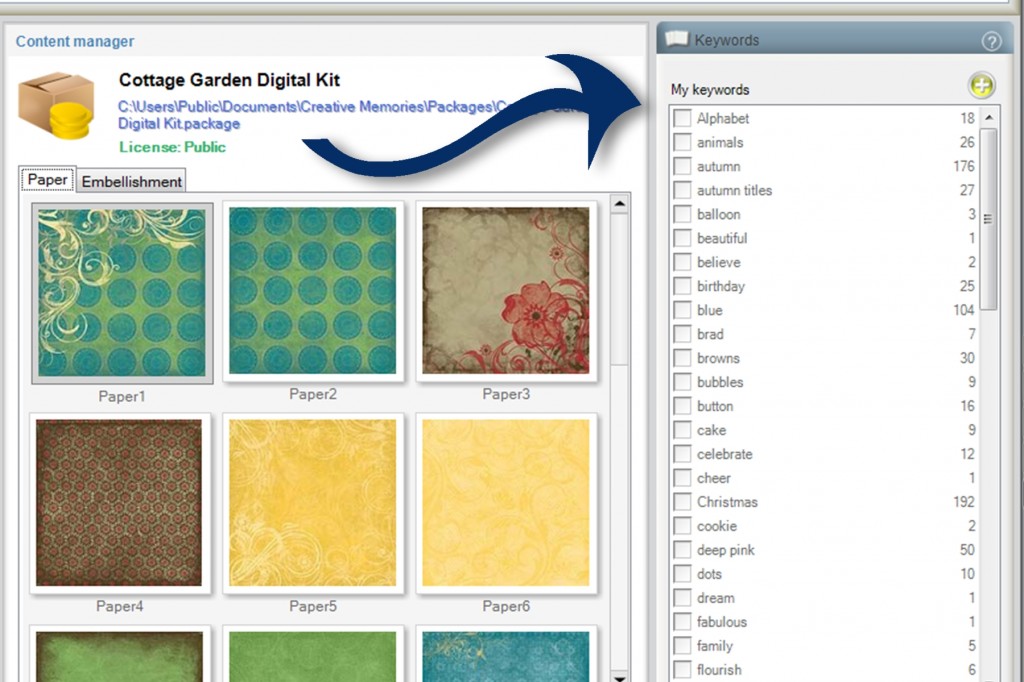
Oh, but it gets better from here! The RIGHT HAND side of the screen looks blank at first, but it is hugely powerful. That column is titled Keywords. And this part is all up to you. Just like searching for something on Google, you can create keywords to tag some of your favorite content and then pull it up quickly when you need it.
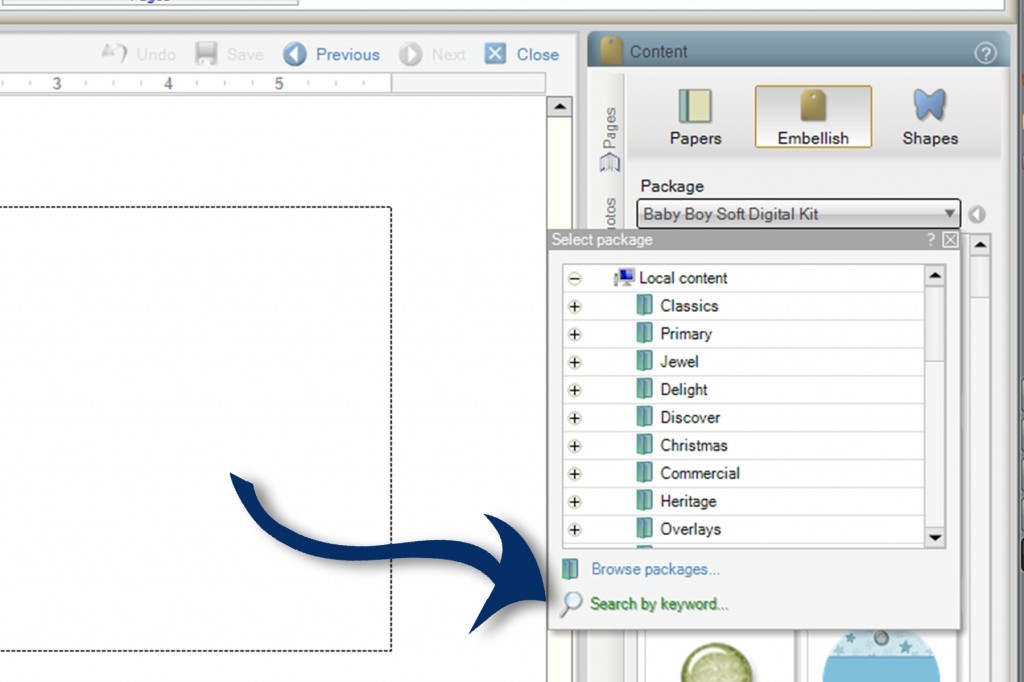
So now, if I wanted an embellishment with stars but I couldn't remember which package they were in, here's how I would find those stars:
Working in my project, from the Content tab I would click on Embellish. Instead of scrolling through the list of folders, I would click on the Packages drop down list and go to the bottom of the window and choose Select by keyword.
Then in the box that comes up, I'll type the word “star” and select the keyword that I've established that comes the closest.
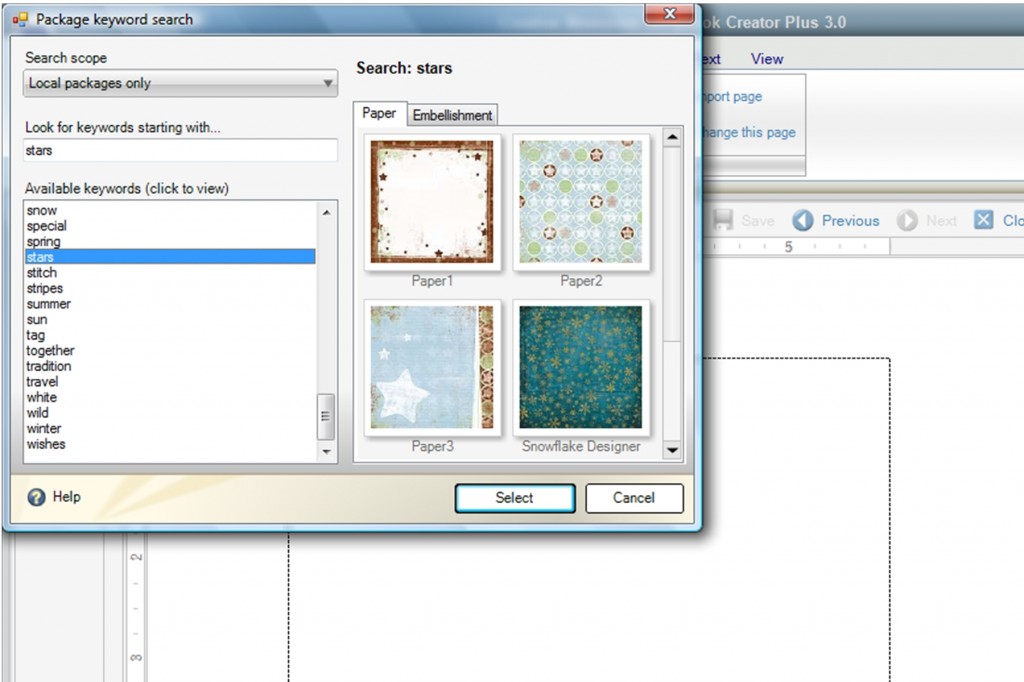
Then just hit Select and choose from the items shown. It'll pull all of the embellishments or papers that you have assigned that keyword to, regardless of what package they come from.
Here's the best tip I have (from Mary Browder, an amazing consultant from McKinney, Texas): there are several items that you can really benefit from grouping by keyword. The first are the Alpha Sets. If you want to insert a Fancy font from the Insert tab, you have to be able to find those Alpha Sets. They aren't just automatically listed. So Mary suggests assigning a keyword to all of your Alpha Sets so you can pull them up easily. Some can be standalone and easy to find, but many are packaged with Digital Power Palettes or Kits and you have to find them in their individual packages and assign the keyword.
The other keyword you'll want to make is Overlays. There are also overlays buried in some content packages at the bottom of the embellishment list.
Hope this has been helpful! I'd love to hear what you think.
